

What Does Xiii Mean In Anime Drawings
Contents
- Getting to grips with Anime-style coloring
- Clip Studio Pigment's tools & how to fix them upwards
- Walkthrough
Office i: Getting to grips with Anime-mode coloring
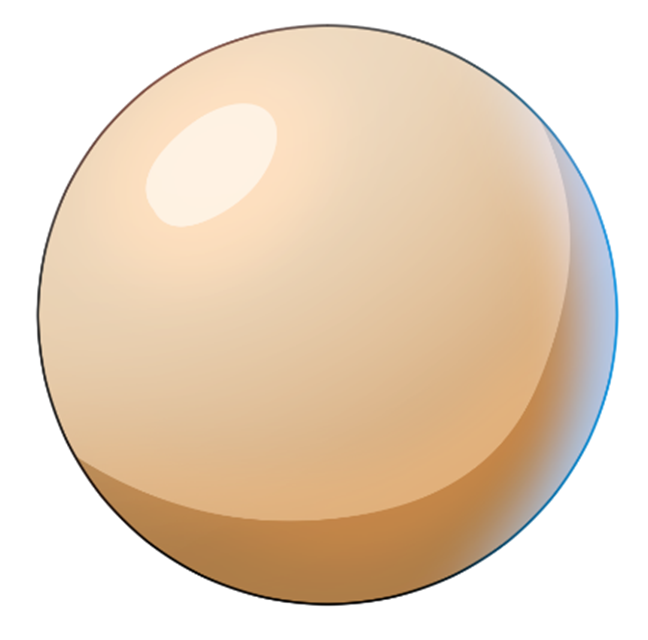
Anime-style or Cel Shading coloring is a style that mimics how traditional anime was animated. Information technology applied simple shading without blending to make it easier to animate.
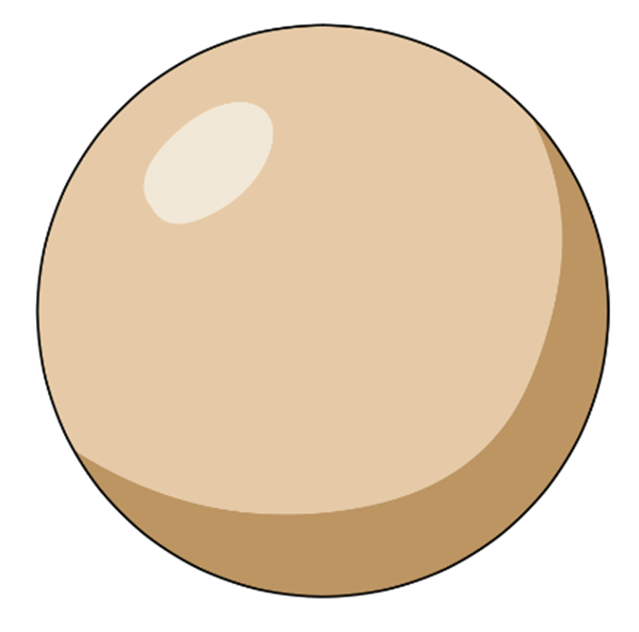
To enhance this kind of coloring style, you can use other tools like gradients or effects. Yous can even apply filters to give an analogy a item temper or feeling. Since this coloring style is very heart-communicable, information technology is not but used in animation but also in illustration.
Advantages:
- Low difficulty level
- Doesn't take a lot of time
- Hands practical and inverse
- Easily adapted to other coloring styles
Role 2: Clip Studio Paint's tools and how to set them up
In Prune Studio Pigment, tools are organized by blazon. Each Tool has sub tool categories. The drawing tools are all in the same category in the sub tool palette.
Tip: Endeavor out different Pen and Pencil tools to find the ones that accommodate you lot. You can apply Pencil tools for sketching and Pen tools for line fine art. There are also lots of other brushes you can use, such as airbrushes for simple gradients and decoration brushes for making patterns. Additionally, yous can also download more than brushes from Clip Studio Assets.
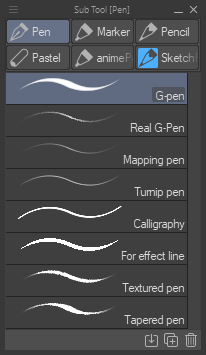
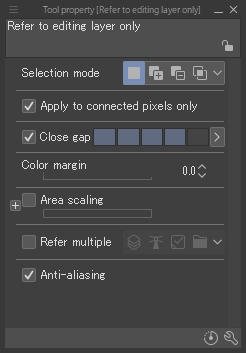
Once you've finished your inking, use the pen tool and the fill up tool to color. For this tutorial, nosotros volition be using the pen tools that produce more of a solid, opaque line, like the Thou-pen, for example. With the Make full Tool, we will mainly be using the Refer only to editing layer and Refer other layers options.
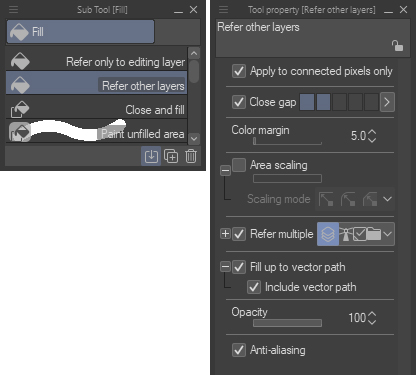
Let's take a look at the Fill Tool's settings:
Apply to connected pixels only: if this is checked, it will fill up the connected surface area. Merely if you uncheck it, it will not fill up the connected area, simply instead, it will make full all the areas that are the aforementioned color on that layer in the color you are filling with. For example, if you lot click on a blueish area, it will fill every blueish surface area in the layer with the color you choose.
Close Gap: if set up to 0, if you try to make full in an area and there are gaps in the line art, the color will fill up areas that aren't enclosed. Yet, if you increment the value, it will become less sensitive to small gaps in the line art and won't spill over as easily. So again, if set also high, it won't evenly fill small areas.
Area Scaling: this volition allow you to fill a little bit closer to your line art and assistance cover the edges between the fill and the line fine art. But if y'all set it too high, it will fill past the line art, so please exist careful.
Scaling Fashion: There are many options here. You lot can play around with them to run across what best suits your work.
Refer Multiple: this will allow you to refer to other layers when filling. Use this setting when you desire to keep the line art and colors on carve up layers.
There are 4 options hither:
- All layers: volition refer to all layers on the canvas.
- Reference Layer: volition only refer to the layer that you set every bit a reference.
- Selected Layer: volition simply refer to the layers currently selected.
- Layer in folder: will refer only to the layers in the electric current folder.
Delight use them as needed.
With the default tools that Clip Studio Pigment provides, the only departure between Refer just to editing layer and Refer other Layer is the usage of Refer Multiple. When yous understand the differences between these tools, they will be easier to use. So in that location's no need to modify the setting each time; instead, you'll be able to choose the right tool for the job.
Opacity: this is how opaque or transparent the color is when you fill.
Anti-aliasing: this will soften the edges of the lines and brand them look less jaggy.
Car Select: otherwise known as the Magic Wand tool. This tool allows you to select a specific area of the same colour. The settings for Auto Select are similar to the Fill tool.
Making Custom Tools
This time the goal is to make a fill and color selection tool that ignores the threshold. For example, if you want to modify a specific color in the whole epitome or select a specific color to draw in.
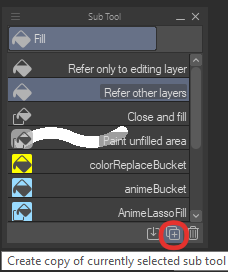
To brand your own custom tool:
- Start by selecting a default tool to utilize every bit a base.
- Click Create a copy of currently selected sub tool (the small icon with two squares and a + symbol at the bottom of the sub tool card), and you will exist able to make a new tool.
- Rename and change its icon and color and so you tin easily find it.
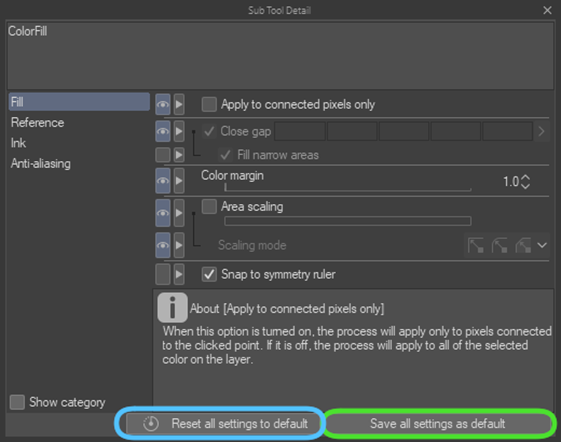
Now you've got the base of your new tool; you can modify its settings by clicking the spanner icon at the bottom of the Tool property tab. This time, we want to fill all the specific colors in the paradigm, so uncheck Utilise to connected pixels only. To save the changes you lot've made to the tool's settings, click Save all setting every bit default in the Sub Tool Detail dialog box. Afterwards saving, if you accidentally change the setting, you lot can easily revert to them by clicking Reset all settings to default.
Office 3: Walkthrough
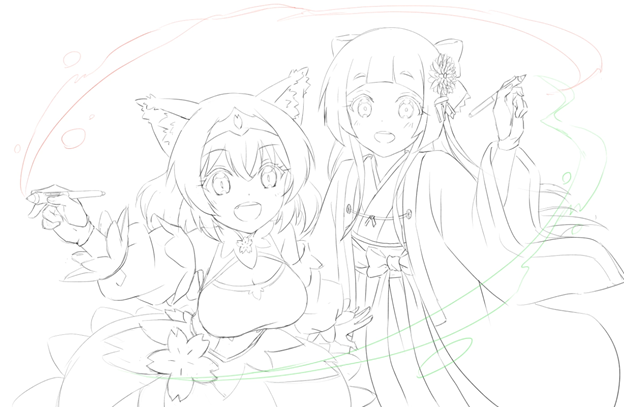
one. Sketch out your idea
2. Paint on the shading guides
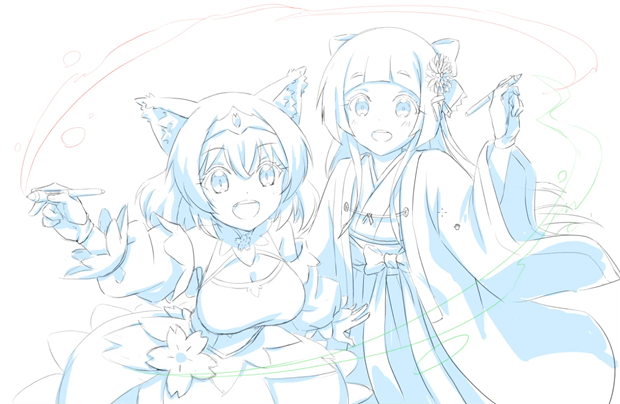
Because the sketching stage is just a rough outline of your idea, you don't accept to spend a lot of fourth dimension on it. This gives you fourth dimension to focus on the direction of the light and where to put the shading. For now, don't worry about the colors.
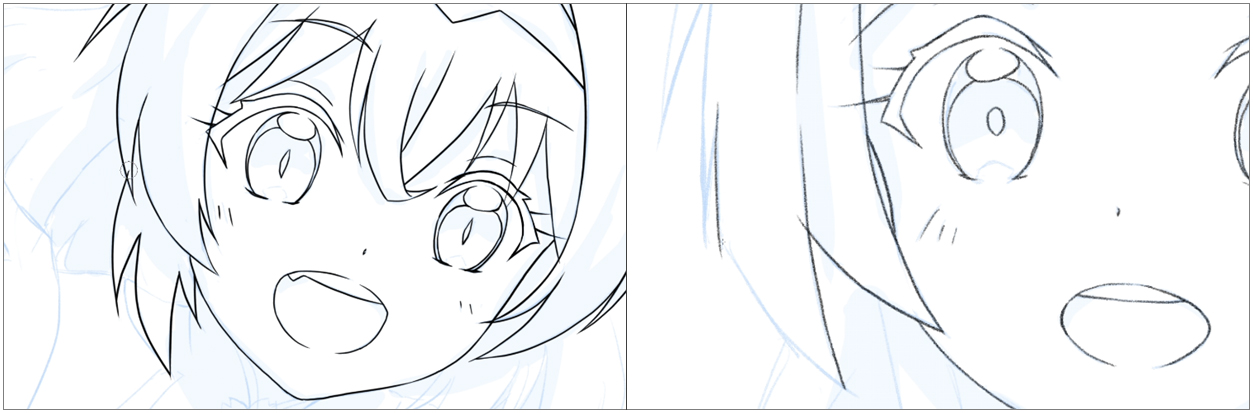
3. Inking
For the line art, let's utilise a vector layer. Vector layers are dissimilar from raster layers. Run into this article for a proficient explanation about how they're different: https://tips.prune-studio.com/en-us/articles/600 Yous can use any pen, pencil, or brush you like to do line fine art. This time I used the G-pen and Existent Pencil.
If you lot desire more than of a hand-drawn look, information technology'due south best to use a pencil tool. But if you want it to be sharp like in anime, the One thousand-Pen will help y'all achieve that effect.

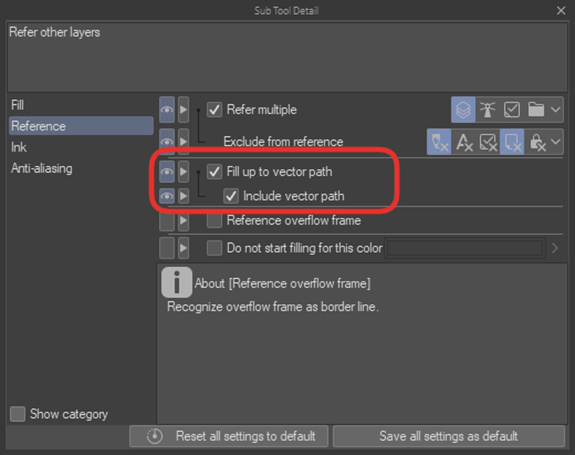
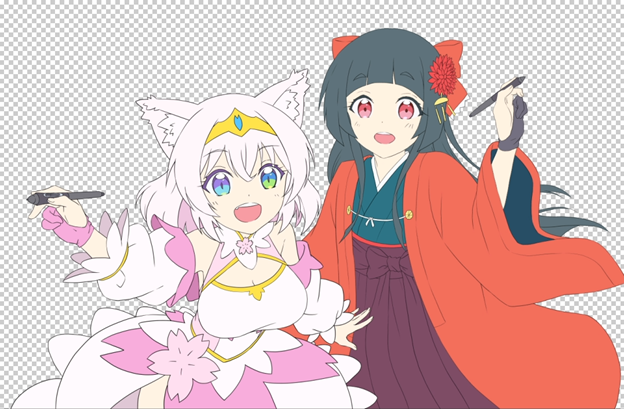
4. Base Color
Brainstorm by creating a raster layer and place information technology below the line fine art layer. And so use the fill tool to lay downwards your base colors. Use the Refer other layers sub tool to make full in the line art layer. To stop white pixels appearing in between your lines and the base colors, employ the Fill up upward to vector path pick in the Tool Belongings tab. Instead of filling up to the edge of the line, it volition take the vector line into consideration, which means information technology will fill in all of the anti-aliasing parts of the line equally well. If you go further into the tool settings, there'due south an Include vector path checkbox also. If checked, information technology will fill to the heart of the vector line.
If you're drawing a grapheme from a reference image, you can use the subview to bear witness the reference image and the color picker to brand sure yous are using the same colors as your reference.
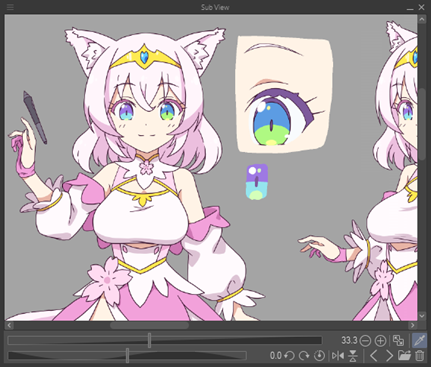
This is a very handy characteristic you lot can use instead of opening multiple reference images and switching through them.
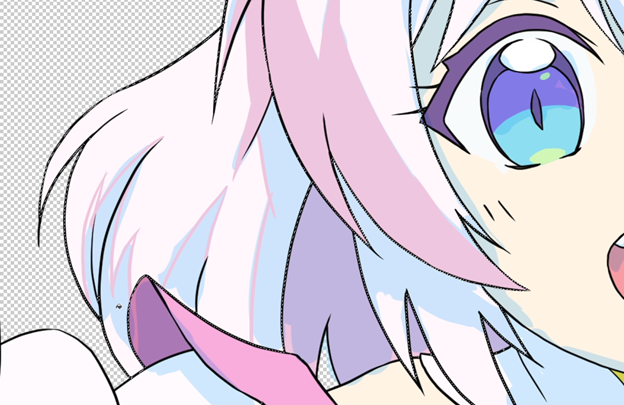
If you want to change a specific color, you lot can utilise the newly created fill tool to easily change the color.
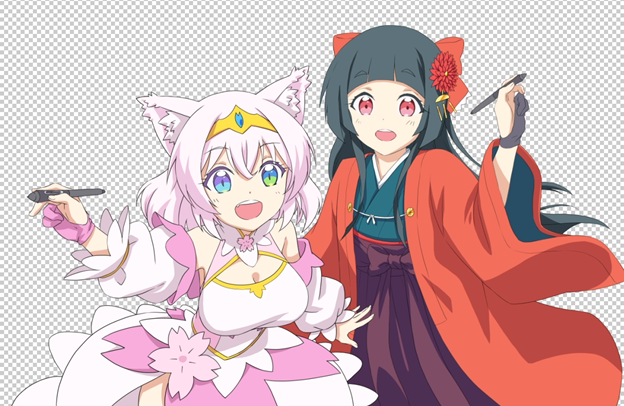
5. Shading
If you determine your lite source when sketching, you tin and so do your shading accordingly. First, create a new raster layer. Then select an opaque pen tool such equally the G-pen so that you can make full the color the shadows in evenly. Then draw lines to create the shape of the shadows co-ordinate to your sketch. Although we are using our sketch every bit a reference, if yous see room for comeback when cartoon the shadows, and so make adjustments as you see fit. As well, be sure to utilize the newly created selection tool, so you don't go over the line fine art's edges. At present, find the color you desire, and and so use the pen to draw the shadow'south edges. Or if y'all encounter some areas that can be colored completely, do it.
You lot can also utilise the make full tool for this step. Information technology's all-time to keep the sketch layer, the line art layer, and the make full layer in carve up folders. And change the fill tool setting from refer multiple to layer in folder. This volition be super helpful for filling in the colors!
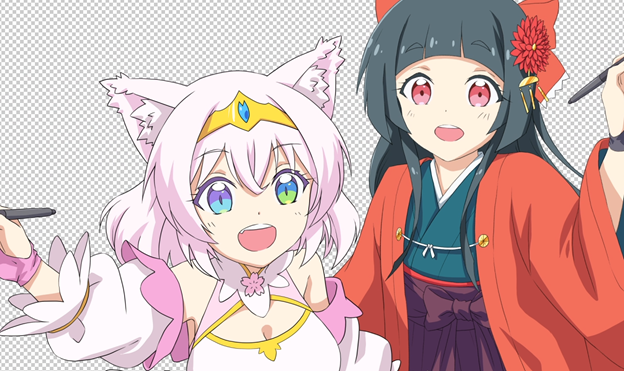
6. Highlights
The procedure is the same every bit shading, but make certain y'all create a new layer for the highlights so they're easier to edit.
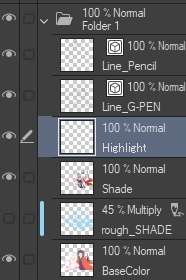
7. Layer Management
Anime-manner coloring is not complicated. So yous shouldn't accept too many layers. Withal, it's a good thought to keep your layers organized and named so they're like shooting fish in a barrel to discover. Since you're non juggling too many layers, and you'll only be blocking in color, yous can use the selection tool to easily select whatever areas you want to suit. If you want to make a work with more than particular, you can always create more than layers later. Today, however, we are going to have it easy.
eight. Add more details to your analogy
For example, add some blush to those cheeks!
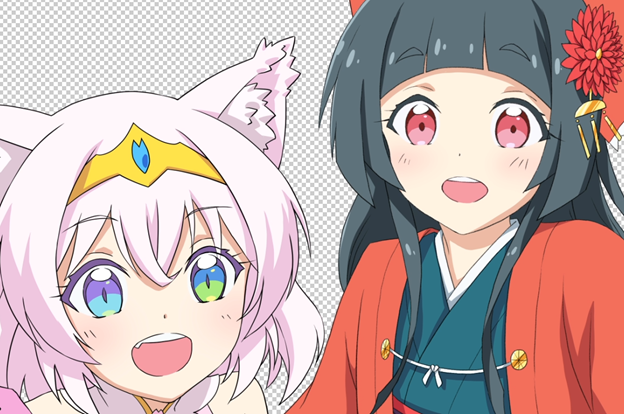
For this step, select the pare color, then create a new layer and lightly employ the airbrush over the cheeks to add a affect of pink. If you lot want to add some gradient shadowing with the airbrush to other parts of the character like the hair or clothing, don't go overboard – just add a light touch. Less is more than hither!
▼Animated GIF

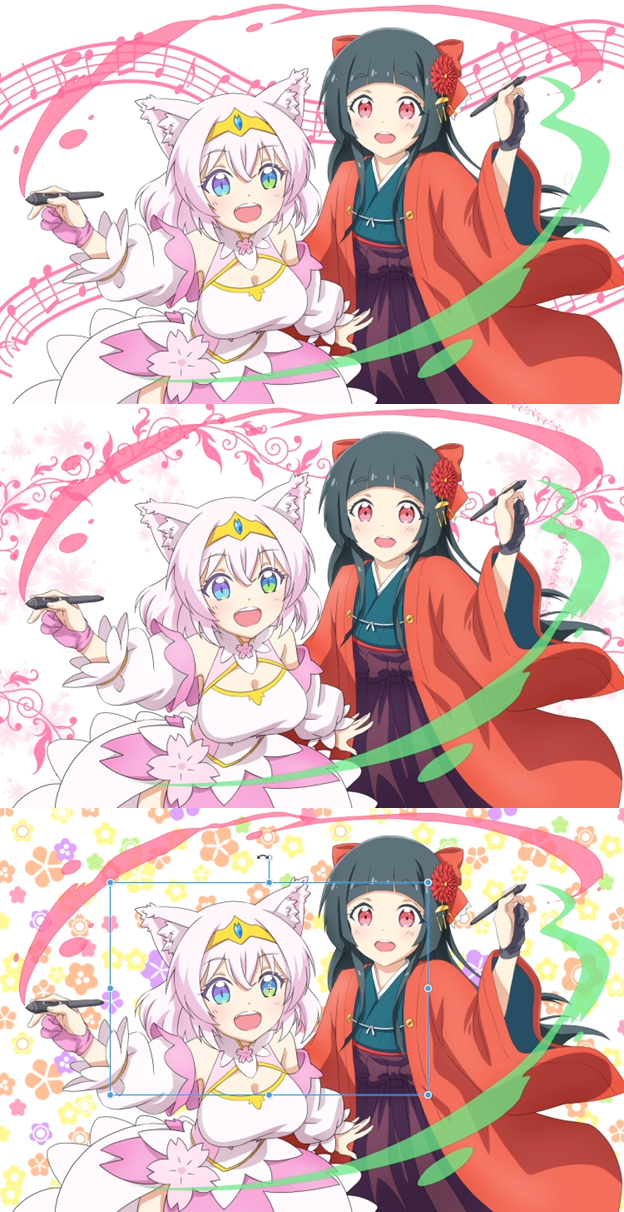
9. Groundwork
If you're not familiar with or sure how to draw backgrounds, a simple and constructive way is to use patterns or ornamentation brushes.
There are some materials pre-loaded in Prune Studio Paint in the Textile palette. You can also download more from Clip Studio Avails.
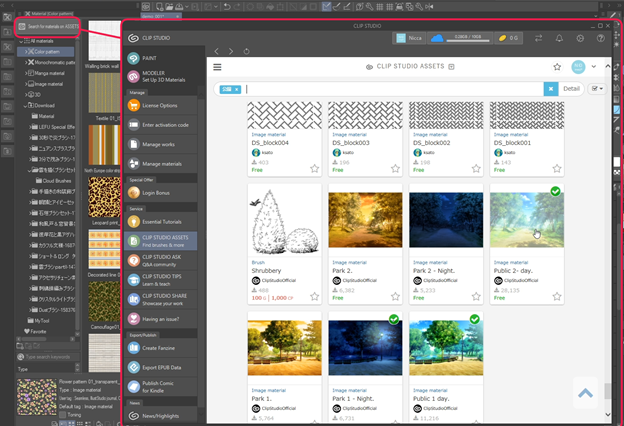
After downloading, yous will find it in the Download folder on the Textile tab.
If y'all desire to use groundwork or design materials, merely elevate them from the Textile tab and drop them onto the canvas. And so use the object tool to adjust them as much as you similar. In the case of brush materials, merely drag and drop them to the subtool tab of your selection. And then you can utilize them every bit you lot would any other brush.
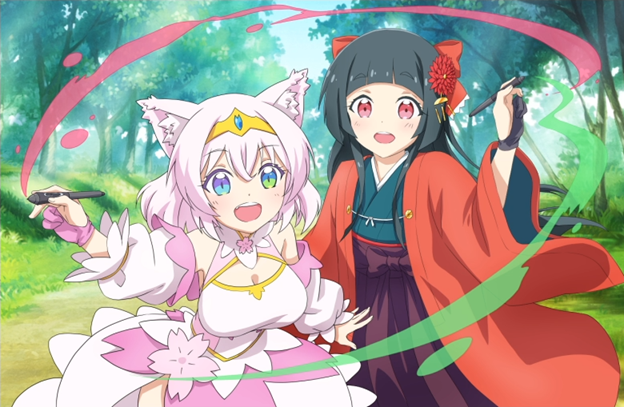
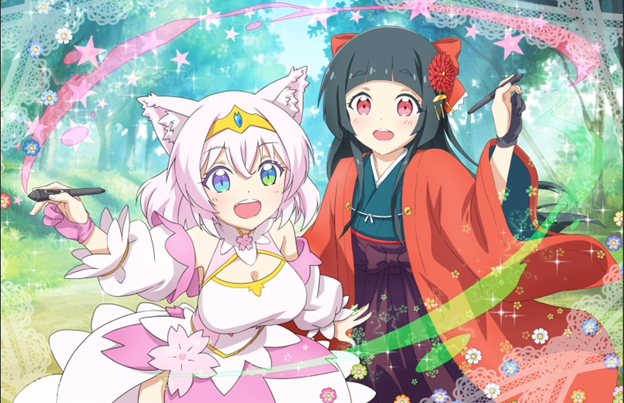
ten. Decorations
Other than adding the background, you can add other details to the foreground of the epitome, similar sparkles, petals, or patterns.
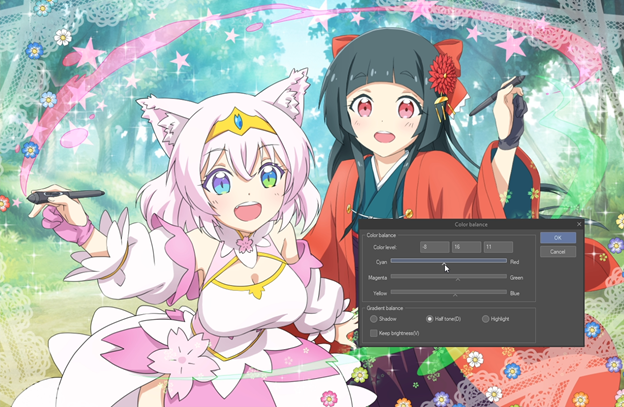
11. Adjusting Colors
When you add together the groundwork, you lot might need to adjust its colour to compliment the characters. Instead of recoloring the whole background, you tin can make use of Correction Layers.
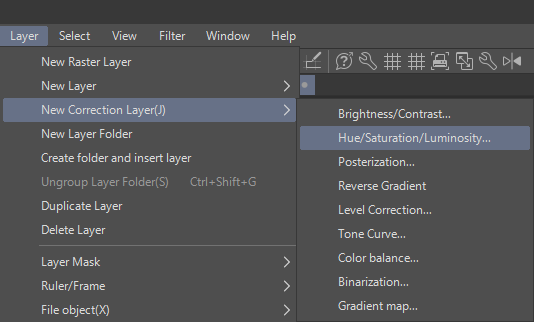
The commonly used options are Tone curve, Color Rest, Hue/Saturation/Lightness, etc. This time we will adjust it a little then they don't contrast too much against the background.
In addition to Correction layers, you tin can easily adjust the color of your characters using the Clipping Layer choice.
Furthermore, you tin can also change the Layer blending modes (the driblet-downwardly menu on the Layer palette) such as Overlay or Soft Light, to adjust the color. Then apply the airbrush tool to smooth things over and give the illustration a softer look.
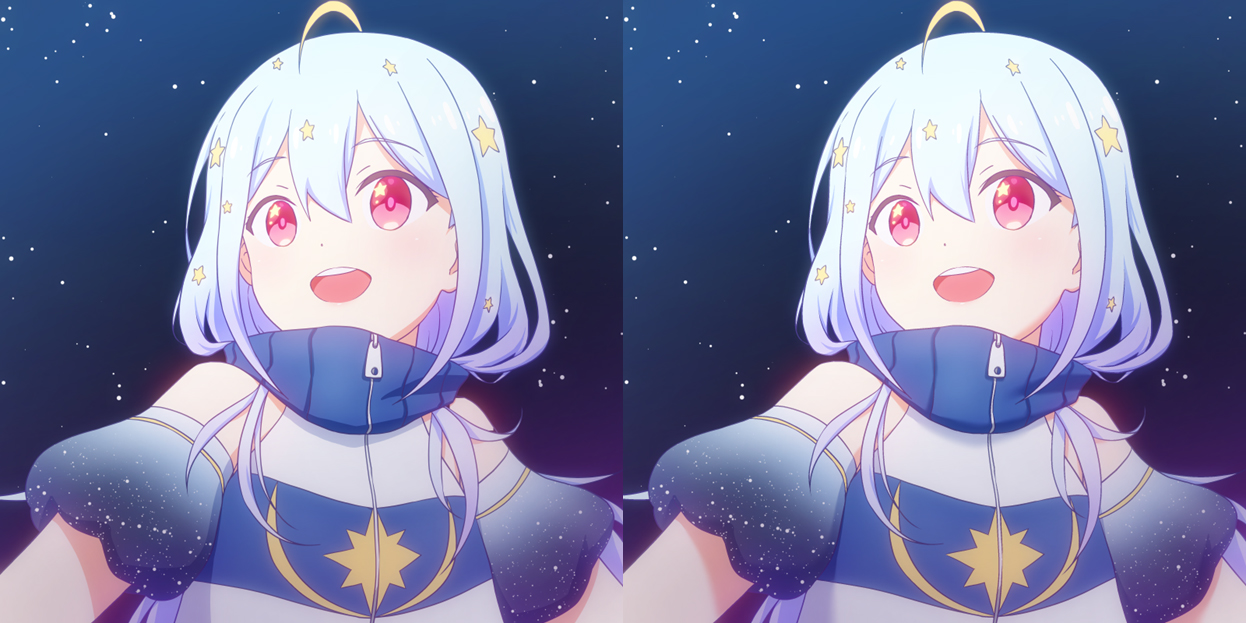
Extra Tips: Diffusion & Glow
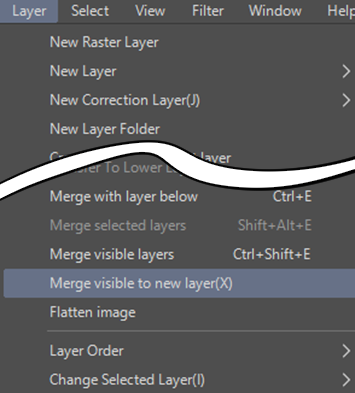
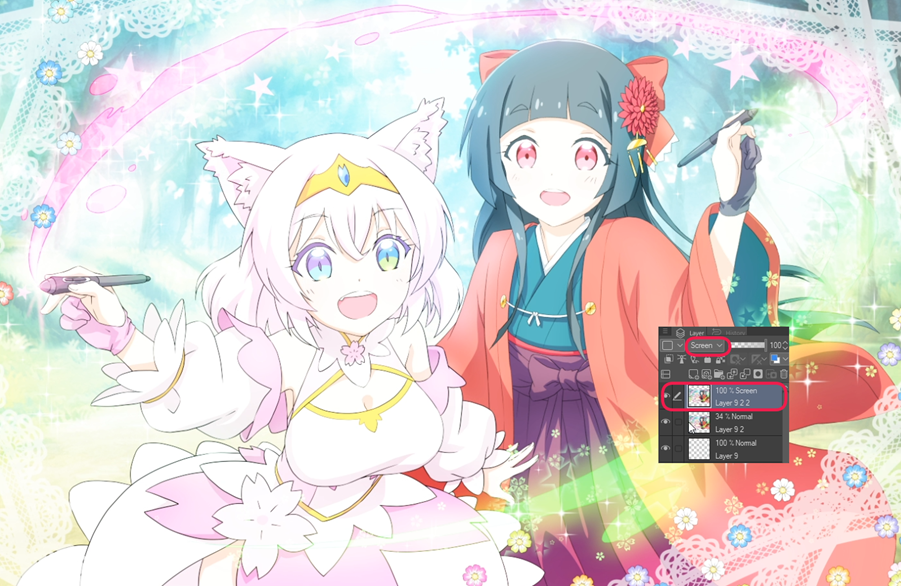
Use the Merge Visible to new Layer control to merge all the layers to a new layer. Then, make a duplicate.
By applying Gaussian mistiness on the top layer (spend some time playing with the settings to find the correct level for your illustration) and decreasing the opacity by well-nigh 20 – 40%, you can soften the analogy fifty-fifty more.
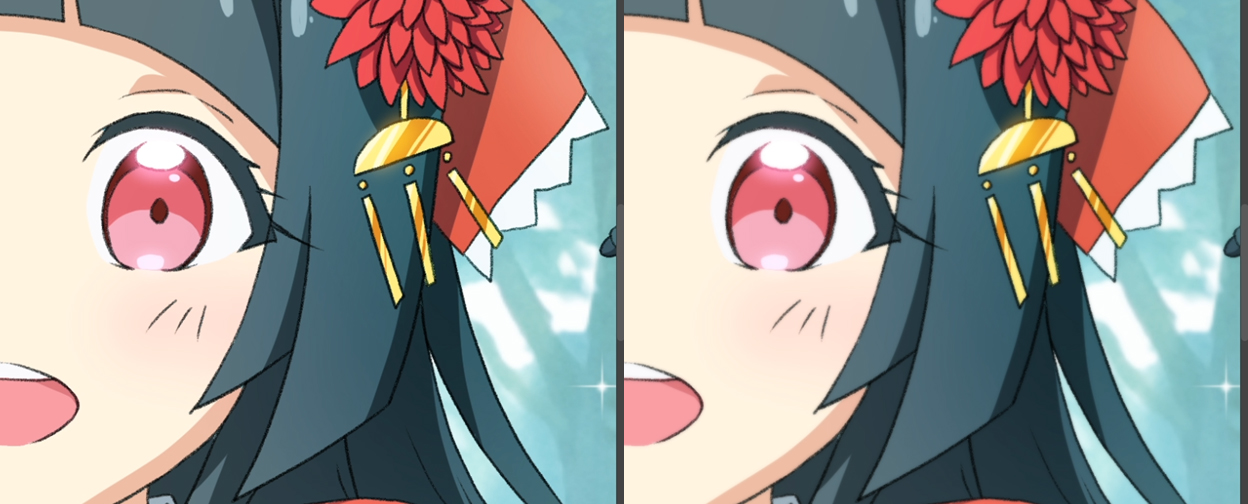
To get a glowing upshot, select the duplicated layer, and change its blending manner to Screen.
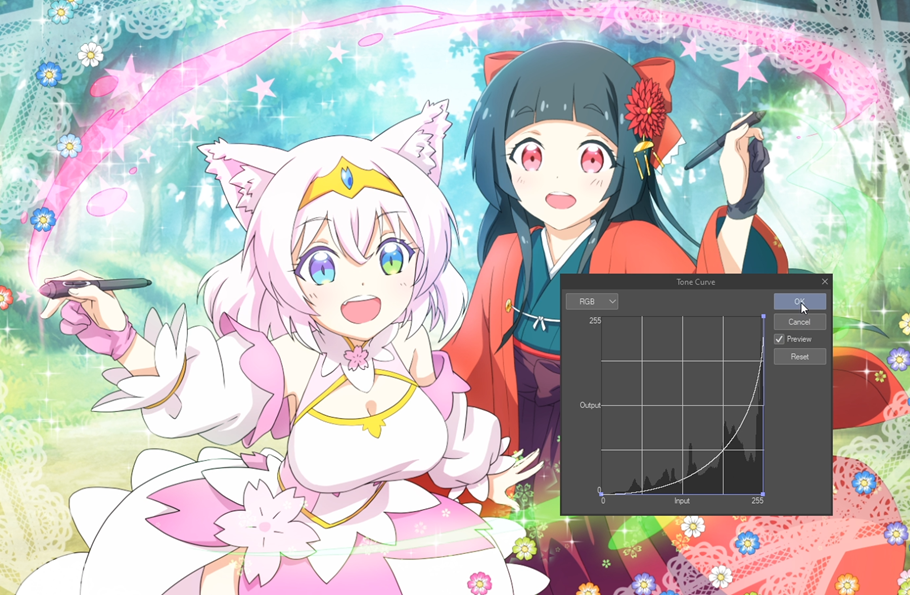
Use the Tone Curve command and accommodate the curve downwardly.
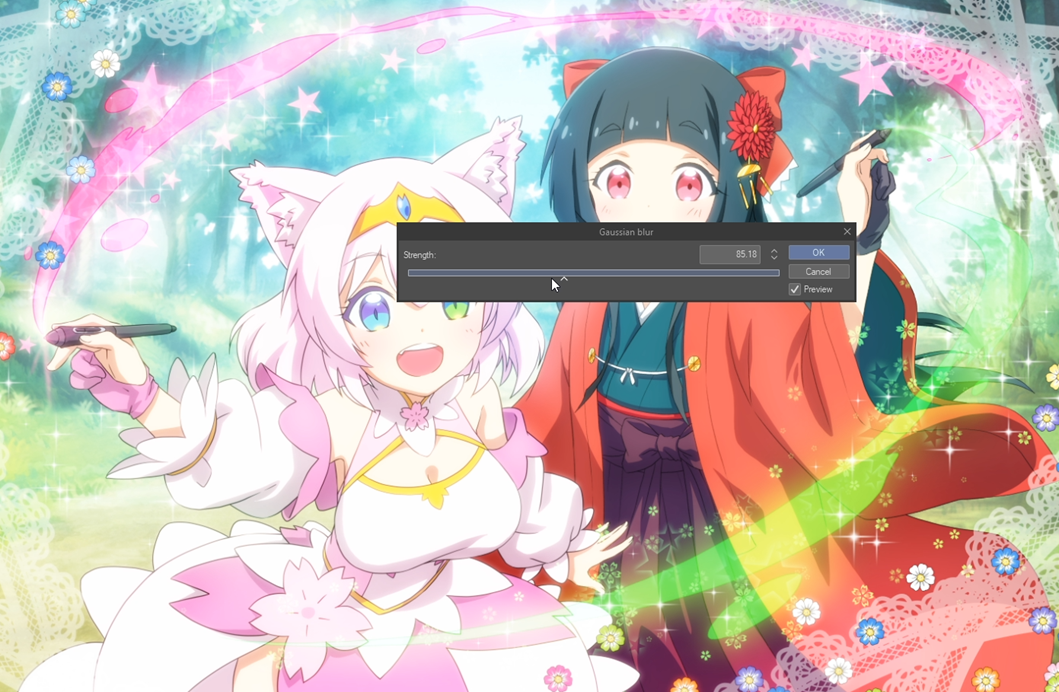
Then apply the Gaussian blur I explained before and decrease the opacity past about twenty – forty%. Et voila!
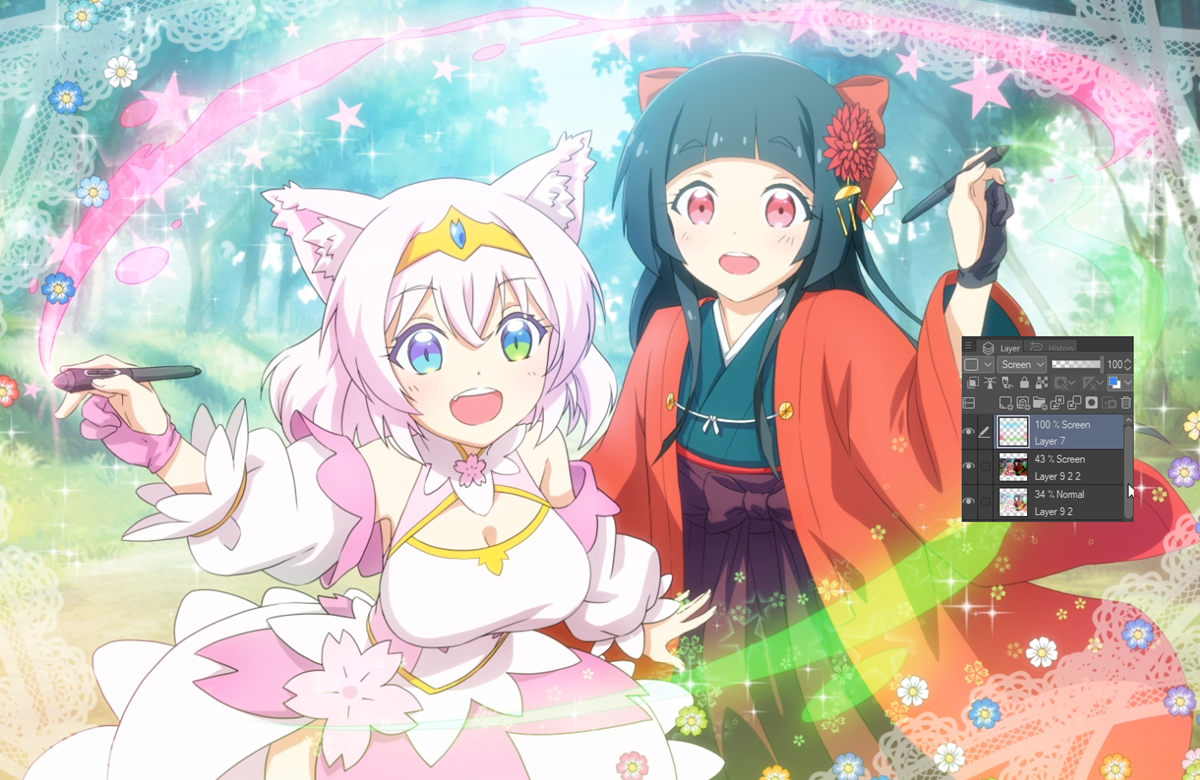
I'll share 1 final hush-hush with yous to brighten up the feel of the illustration. If you create a new layer to a higher place all your other layers and change the blending style to Screen, then utilise the airbrush to add a calorie-free colour around the edge of the sheet, information technology makes the image vivid and shiny as if in that location is light shining through the air!
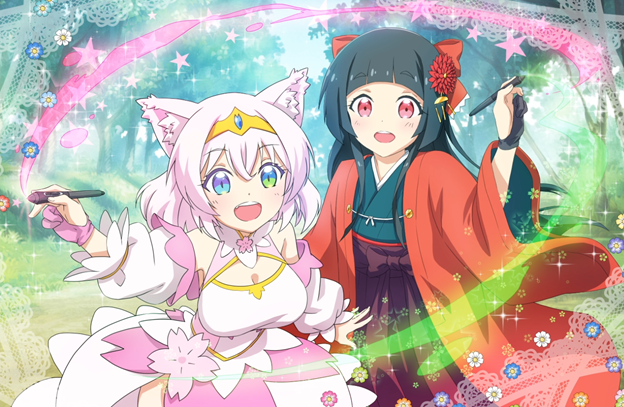
Take a look at the concluding analogy and download the file here.

Source: https://www.clipstudio.net/how-to-draw/archives/162911
Posted by: bishoplonswellot.blogspot.com
0 Response to "What Does Xiii Mean In Anime Drawings"
Post a Comment